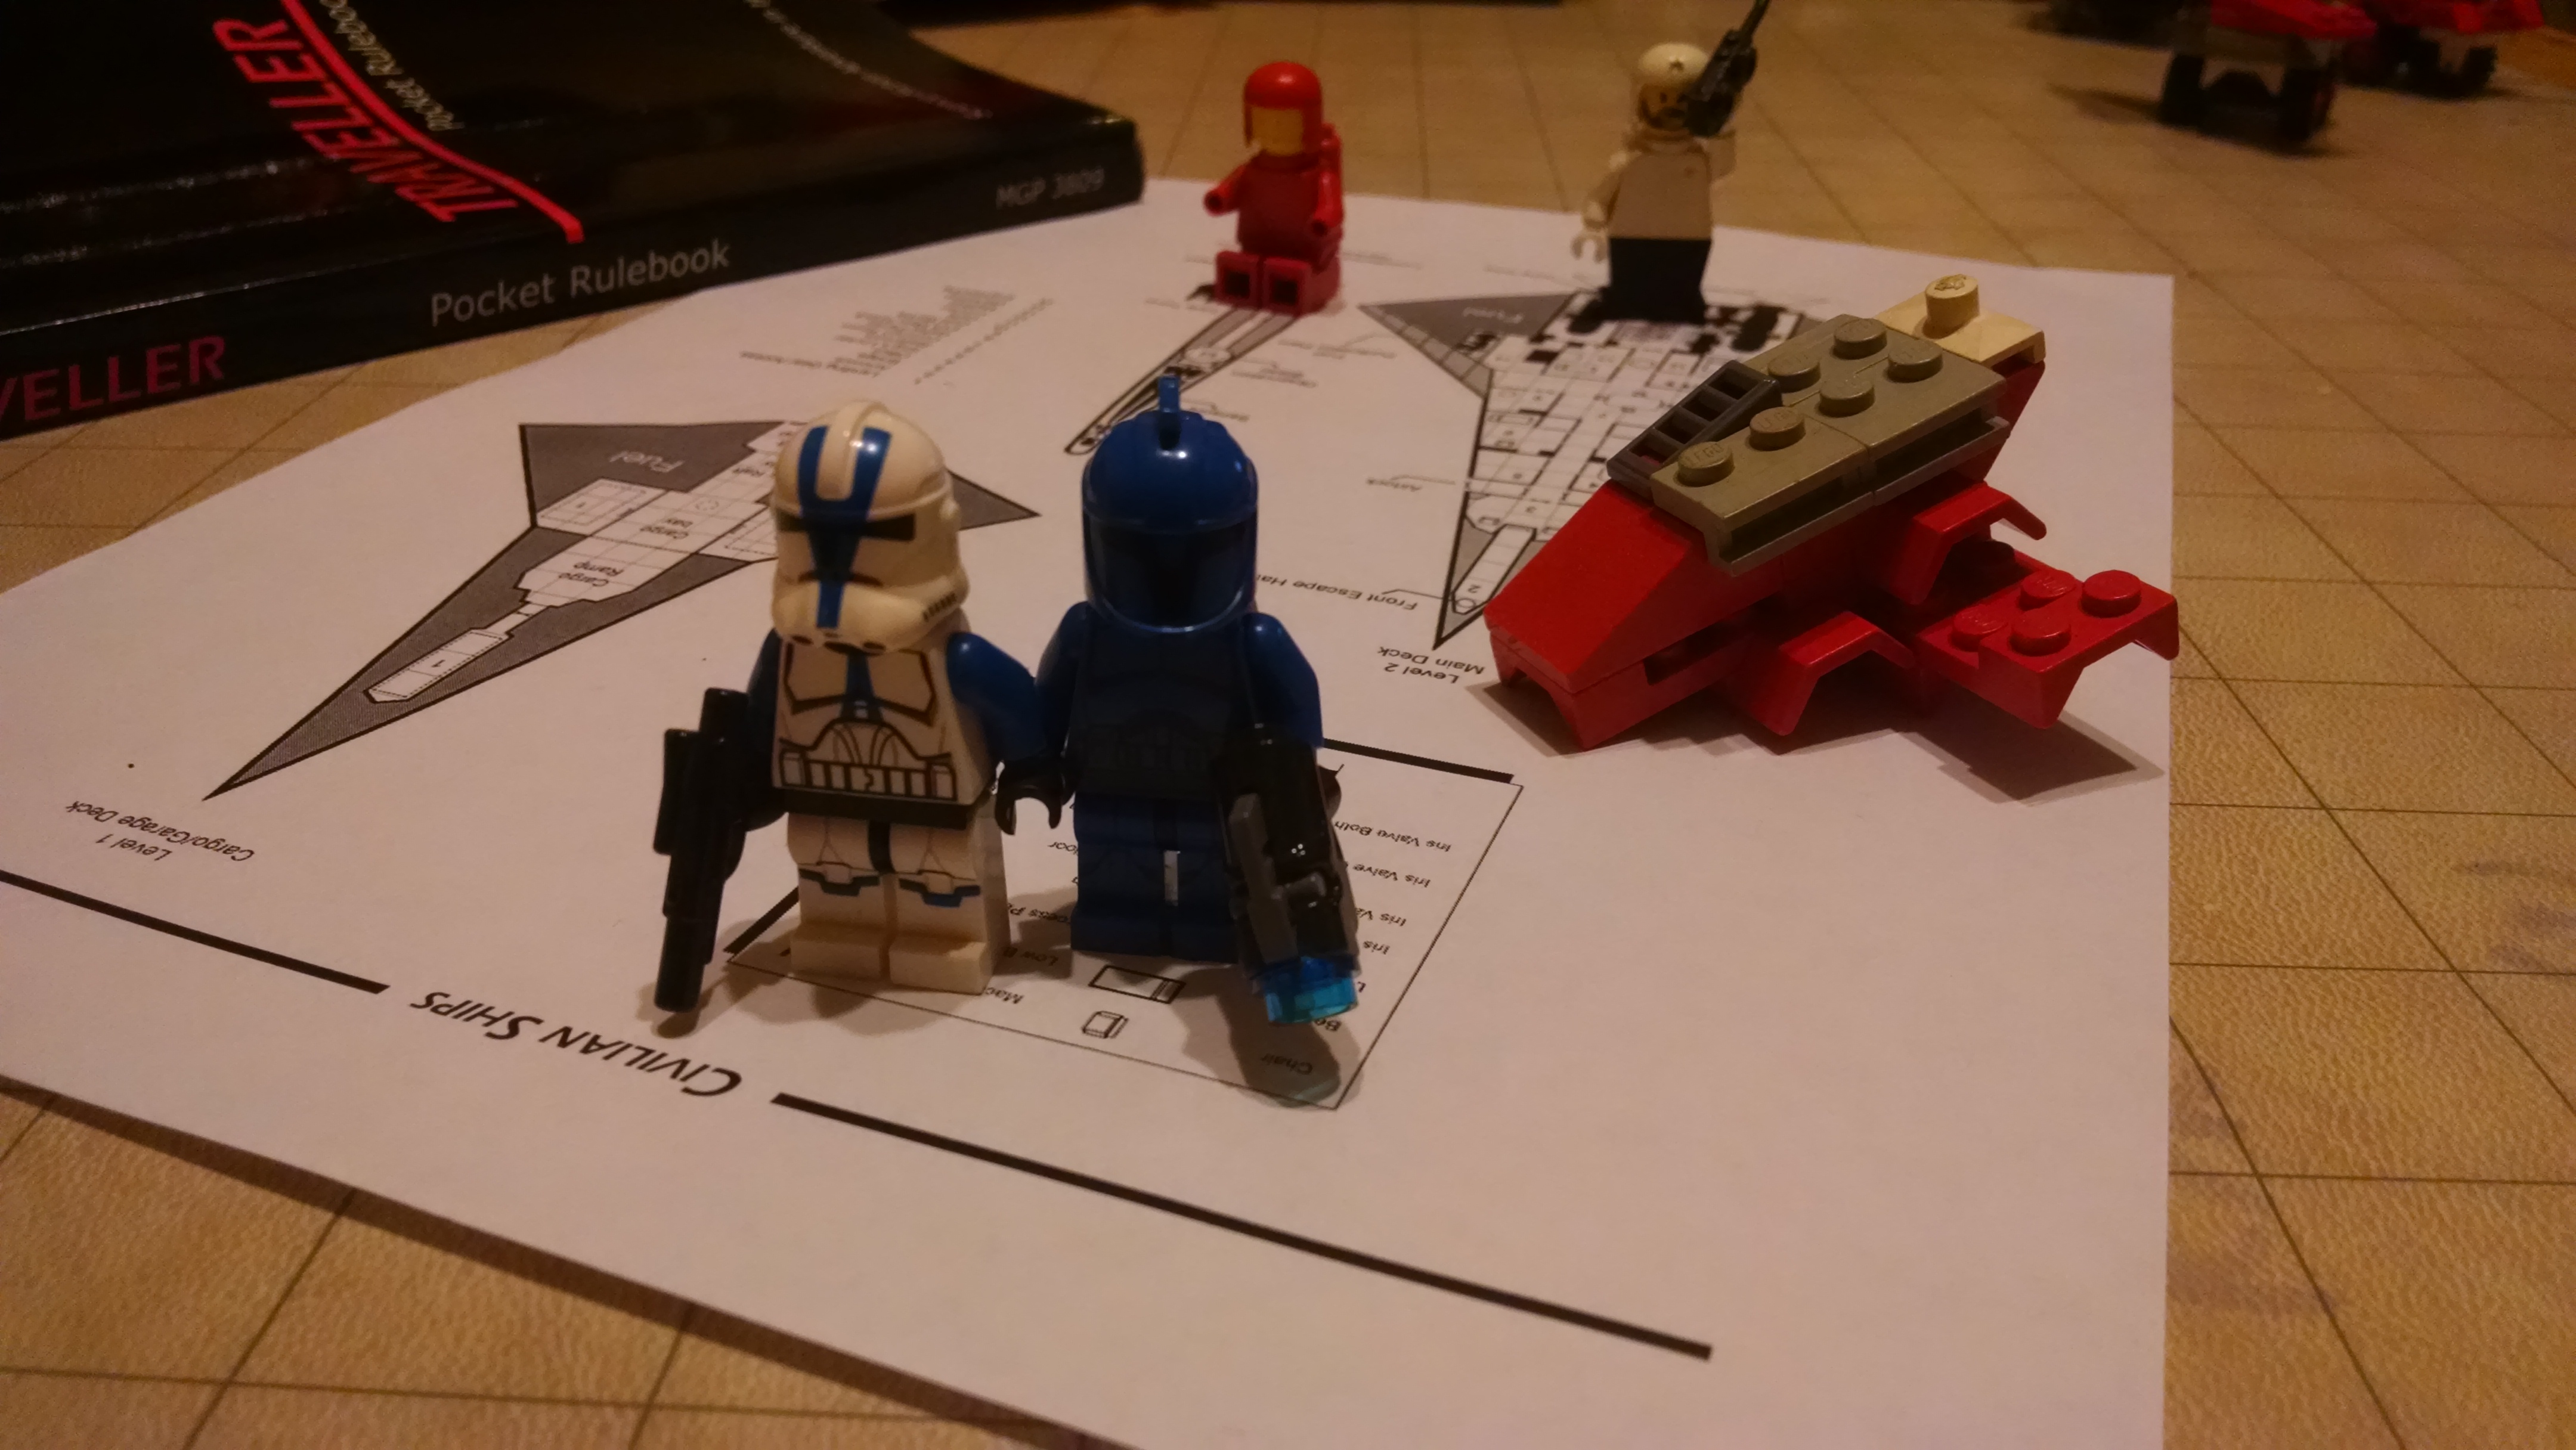
Bounty Hunters of the Skein Reach – SS Razors Edge
Lovers and bounty hunters, Zab Brennick & Mista Noral were trained as special forces space marines and served in separate units for nearly a dozen years. Imperial Marine companies are strictly gender separated – they are sworn to put aside family as a sacrifice to the Emperor – but their respective companies were both deployed to put down the rebellion that had sprouted on Zaveros-8b. Their units fought side by side in the tunnels and habitations of that moon, and Zab and Mista were surprised to find themselves falling in love.
The Imperial response inflamed the rebellion, and soon the entire Zaveros system burned with the flames of uprising. When Imperial command decided to cut their losses and bombard the rebel capitol Zab and Mista were cut off from their units and left for dead. Determined to start a new life together, they escaped by stealing a ship and fleeing the Imperial fleet.
Now, they co-captain the SS Razor’s Edge, a modified Huntress-class starship. Their main trade is bounty hunting, and their preferred tactic is to follow a their quarry to a starport, sabotage their weapons with remote-detonating explosive charges, and attack them as they are preparing to jump out of system.
 Zab and Mista wear custom combat armor suits with medical sensors which feed vital signals to double dead-man switches. The Razor’s Edge ship computer is programmed to fire all weapons, put the engine into thermal overload, and self-destruct if both of them die.
USS Razor Edge, a Huntress with a crew of four, Zab, Mista, and two crew.
Bounty Hunters – Zab Brennick & Mista Noral
Naval (Crew) 3, UCP 8 8 8 8 8 6,
Pilot (spacecraft) 2, Mechanic 1, Vacc Suit 1, Zero-G 1, Comms 0, Sensors 1, Gunnery (turret) 2, Engineer (P-plant) 1, Engineer (life support) 1, Remote Operations 0, Melee (unarmed) 1, Gun Combat (rifle) 1,
combat armor (armor 12), laser rifle (5d6)
Crew – Jim Heward & Mike Landa
UCP 777777, engineering 1, navigation 1, repair 1, sensors 0, gunnery 0, gun combat 0
boarding vac suit (armor 8),
laser carbine (4d6)
Encounter Hooks:
- The player characters (PCs) have crossed the wrong person and earned a bounty somehow, and the Razor’s Edge finds them by chance.
- It’s a case of mistaken identity, but the crew of the Razor’s Edge think the player characters are wanted. It may be that their ship is a close match to a wanted ship. Regardless of the truth of the situation, they sabotage the PCs’ ship’s weapons and attack them.
- The players have the opportunity to hire the Razor’s Edge to assist with a mission that’s beyond the PC’s abilities.
- The Razor’s Edge is hunting the same live-capture bounty the PCs are. Maybe they try to beat the PCs to the punch and get the target first. Or they might lay in wait and attack the PCs as soon as they have the target in custody.
- The PCs, who have no starship, sign on as crew of the Razor’s Edge.
Using the SS Razor in Your Game
When I whipped these guys up, I needed a bounty hunter ship that would go after my Travellers for raiding an imperial outpost and stealing a whole cargo-hold of renegade droids. They also stole the station’s main computer core curing the fracas. The Travellers got their turrets knocked out, then beat the bounty hunters when they tried to board. They’ve been much more careful about keeping guard on the ship since then.
Posted in Character, Encounter, Traveller by Adam A. Thompson with no comments yet.
Banquet of Horrors
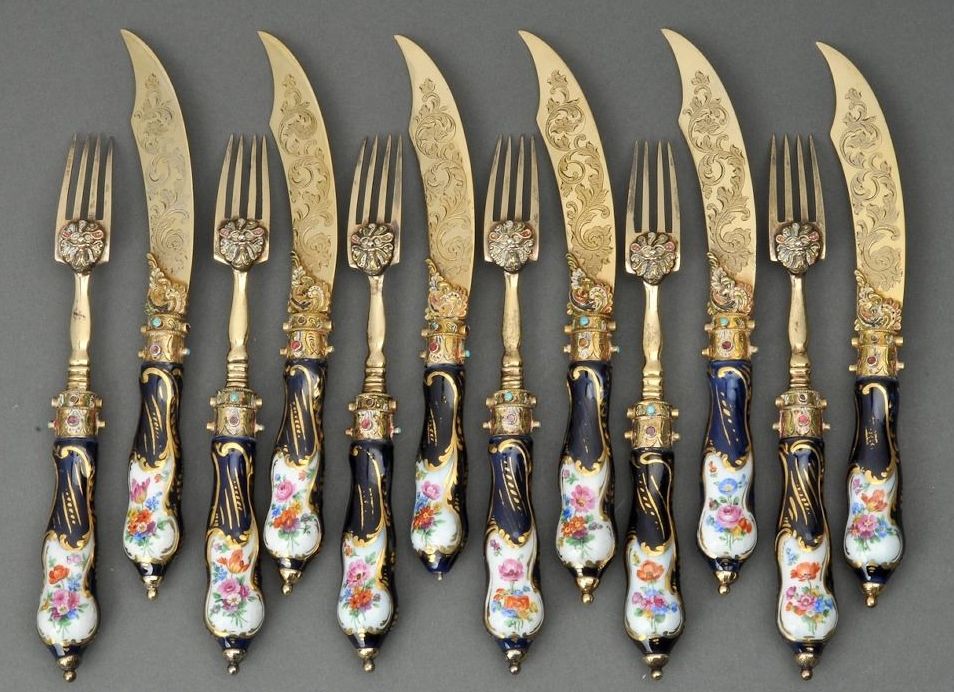 In sumptuous banquet hall in the Tower of Zards, the walls are festooned with skeletons in manacles. On a table laid with golden plates, cups, and cutlery, there lay beautiful bejeweled forks bearing a curse. Upon picking a fork up characters are compelled to begin eating themselves. Every round affected characters must succeed on a DC 13 Charisma or Strength saving throw or stab themselves with the ornate fork and eat their own flesh, dealing 1 HP of damage.
The skeletons in manacles will begin a mocking, cruel cackling if anyone picks up a fork and takes a bite of themselves.
If they are incautious, multiple player characters may end up feasting on themselves. The curse can be temporarily interrupted by intoning a solemn prayer to the gods, or through use of a cleric’s turning power. The curse can only be ended permanently by a remove curse spell, or by melting the cutlery down, destroying most of their value. Until such time, any time the cursed PCs eat something, the curse activates again, they find the evil fork inexplicably in their hand, and they must make a Charisma or Strength save every round as described above. This may lead to fatigue or inability to rest if the players don’t eat so as to avoid the curse.
Posted in 5th edition Dungeons & Dragons, Encounter, Magic Item, Trap and tagged cursed, Tower of Zards by Adam A. Thompson with no comments yet.
Finkald’s Freebooters
medium level fantasy encounter
While travelling on the road, the Player Characters (PCs) encounter “Finkald’s (‘Fin-kald) Freebooters”, a small army composed of rowdy dwarven mercenary veterans. They are fresh from a string of victories in the lands to the west, and are on a quest to find the fabulous lost dwarven stronghold of Kargoth. Finkald claims to have a map that shows the way to Kargoth, also known as “The Invisible Fortress”, but will show it to none, saying he has committed it to memory. His secret, which he will never admit, is that he recently learned that his victories in the east had led to his being singled out for assassination by the wild priest-hunters of the elven lands they had been raiding. He is therefore leading his warband as far away as he can get from those woods.
Upon meeting the party, Finkald will size them up, silently appraising their wealth, asking which way the roads lead, if they know anything of Kargoth, and who the players are and where they are headed. While Finkald talks the dwarves will fall out of order to begin drinking from a keg on a wagon and eating from a haunch of roast deer. Some will gather to hear the conversation.
Unless the players flee or offer to join Finkald on his journey to Kargoth he will ask them if they can help the army with any spare provisions they may have – “You see how hungry my Freebooters are – full bellies keep them happy!”. If the players seem wealthy and relatively weak, he might ask for gold or, particularly, any gems or jewelry they players are wearing. If the players refuse to give him what he asks for, he raises his voice and makes threats, “What’s to stop us from taking it, and everything else you have!?” Unless the players pay his price or run away, they try to take the players’ valuables by force.
ENCOUNTER – low to medium level
- Fainkald – dwarven ranger 6
- Seargents – 3 x dwarven fighter 4
- Freebooters – 20 x dwarven fighter 1
Posted in Encounter, rules agnostic and tagged Fantasy by Adam A. Thompson with no comments yet.
Room 7: Athganazar’s Laboratory
This area is a separate level that can only be accessed by the methods described in Room 6: The Crucible.
As the arcane mist dissipates, you appear in what looks to be an ancient laboratory which while dusty and archaic, has seen recent use. Tables along the walls and shelves set into alcoves in the walls are filled with various alchemical apparatus, half-completed mixtures and parchment. In the center of the room is a stone bier upon which rests a body draped in silken robes. A cracked flask with what remains of a dark, viscous liquid is on the floor nest to the body.
Athganazar is not actually dead but is instead a Proto-lich who has so far failed in the attempts to achieve the full undead status and abilities he desires.
This laboratory is where Athganazar’s soul has been awaiting new bodies to possess and attempt to finish his transformation into a lich. His dead body is what is lying upon the bier while his soul has moved into his phylactery (a plain seeming stone jar upon the top shelf along one wall of the room. It will appear as magical to detect magic, despite its otherwise plainness. The jar is tiny and has 40 hit points, hardness 20, and a break DC of 40) from which he will attempt to possess (via magic jar spell) the character that has seemed the most resourceful in solving the challenges up to this point.
His plan is possess one of the players and attempt to have them drink the remains of the liquid in the flask to attempt to create a new lich body for himself. If he succeeds then he will go ahead and kill the party.
Failing that, he will attempt to kill as many characters as possible, leaving the possessed body if it is slain to return to the jar and to possess another, continuing this until there is only one character left. When only one remains, he intends to possess that body and to use it to make another attempt at successful lich creation.
To defeat him, the party will need to locate and destroy the phylactery (thus leaving him no avenue of egress) and to either kill the character which he has currently possess of to find a way to otherwise force him to leave that body. If forced to leave or the possessed body slain after the phylactery is destroyed, (and there is no active Proto-Lich body ready for him) Athganazar will be destroyed.
The flask of dark liquid in the flask is the remains of the lich creation potion that Athganazar drank which killed his body but left it in a state of perfect preservation. If a PC tastes the dark liquid then they must save or die (Con DC 30). If they succeed they then take 20 pts of damage. If they fail their body becomes a new, empty proto-lich ready for Athganazar to possess. Likewise, if they spill or apply the liquid to the body lying upon the bier then that body will also become a revitalized proto-lich vessel suitable for possession as well.
Posted in 3rd edition Dungeons & Dragons / d20 fantasy / Pathfinder, Encounter, Magic Item and tagged Fantasy, The Tomb of Athganazar by Stephen Hilderbrand with no comments yet.
Room 6: The Crucible
The Word “Crucible” is carved above the doorway into this room. In the room, a large fire elemental is seemingly contained by the magic circle upon the floor. Between you and the elemental is a large marble bowl set upon a stone base.
DM Notes: The bowl is literally the crucible needed to re-forge the broken key. For this challenge the party will need to place all four of the key fragments into the bowl and then free the elemental and lure it into engulfing the crucible. Once that happens the elemental will be consumed and the key will be restored. All four fragments must be in the bowl for this to work. Any less and nothing happens.
If the elemental is instead slain by the party it will reappear in the circle one round later (and the circle will be restored of any damage it may have taken as well) effectively resetting the encounter.
Once the key has been re-forged, a keyhole will appear in the north wall of this room. Once the key is placed into the keyhole and turned, the tumblers will wail and the party will be teleported to the actual “tomb” of Athganazar. If lured into the crucible:
The elemental lumbers into the crucible, arms surrounding the rim, legs dropping into the heap of keys. Its eyes stretch downward as if tears and its gaping maw crackles with embers. A fiery blaze fills the crucible, the elemental disappearing among the smokeless flames. Suddenly, the warm light of the fire is extinguished. Among the ashes you see an ivory key.
Once the key is lifted from the ashes, they will notice that the head of the key is carved into the head of a skeleton:
As you turn the key over in your hand, you note that the skeletal head of the key has reflective eyesockets, iron fangs, and a crown inset with six prismatic gems – ruby, topaz, sunstone, emerald, sapphire, amethyst. Iron fang-like prongs jut out into the darkness at jagged angles.
Once the key is inserted and turned:
The eyes of the key ignite in a bright burst as the floor swirls into a rainbow portal. You fall in.
Posted in 3rd edition Dungeons & Dragons / d20 fantasy / Pathfinder, Encounter and tagged Fantasy, The Tomb of Athganazar by Stephen Hilderbrand with no comments yet.
Room 5: Monster Summoning Trivia
As you enter this room you feel a coldness as if a frigid vapor sucked the life out of the room. Then you see a nebulous cloud of energy which seems to be contained within a summoning circle engraved upon the floor. The 5’ square tile directly before the circle glows with an opalescent silvery sheen.
A plaque set into the floor reads:
“How well do you know the creatures that you may face? You will be asked questions about the creatures that you will see before you. A correct answer defeats the beast. Answer incorrectly and the beast may defeat you.”
Once a character steps upon the colored square, the energy in the circle will resolve into the image of one of the following creatures and a disembodied voice will ask a question related to the specific monster. A correct answer will cause the image to disappear and the voice to say “Correct!” With an incorrect answer, the creature becomes corporeal and is unleashed upon the adventurers.
DM Note: Choose a number of questions based on what you know about your players’ preferences, the session time and how well the players have answered the questions (for instance, you may not want to play out five successive combats). In my experience, players tend to answer 5 or 6 correctly and then end up fighting 1 or 2 combats. Once the creatures/questions are defeated (one way or the other), a fang key fragment will appear in the center of the circle. If you want your players to be presented with another challenge, explain that the circle is still active and see how they retrieve the key without being telefragged.
Sample Monster Trivia
Wail from this undead creature causes hearers to die on the spot • Banshee
Slimy scavenger that can flow through narrow openings and lives underground • Black pudding
Teleporting canine • Blink dog
Distant relatives of halflings; also name of a delicious desert • Brownie
Also known as the ‘landshark’ • Bulette
Half man, half horse • Centaur
Tiny creatures that drain psionic abilities • Cerebral parasite
Rooster-like creature whose touch turns flesh to stone • Cockatrice
Arch-enemies of devils • Demon
Humanoid shape shifter • Doppelganger
Can belch forth a cloud of scalding steam • Dragon turtle
Leaves eggs in creature’s head which hatch and eat host • Ear seeker
Giant-like creatures with two heads • Ettin
Purple mushroom with tentacles that cause flesh to rot • Violet fungi
Indistinguishable from ghouls except for their carrion stench • Ghast
Hyena-like humanoids • Gnoll
Magic servants made of clay, flesh or iron • Golem
Slimy horror that resembles wet stone or sedimentary cave formations • Gray ooze
Fire breathing dog • Hell hound
Larger tribal cousins of goblins • Hobgoblin
Multi-headed reptilian monster • Hydra
Evil Intelligent manta rays • Ixitxachitl
Jackal able to assume the form of a man • Jackalwere
Half woman and half animal, touch drains a creature’s wisdom • Lamia
formerly ultra powerful magic-users now non-human and non-living • Lich
Reptilian humanoids that dwell underwater • Lizard man
Disguises itself as part of the ceiling • Lurker above
Worm-like fish with poison spines • Masher
Psionic humanoid forth brains with its tentacles • Mind flayer
The ‘Wraith of the deep’ • Morkoth
Big cousin to the Otyugh • Neo otyugh
Water sprites/pixies • Nixie
Giant amoeba that is golden and sludge-like • Ochre jelly
Fiercely competitive bullies made popular by LOTR • Orc
Half owl and half bear • Owlbear
Lower bodies of birds and the upper bodies of stags • Peryton
Dragon-like with a flexible sting-equipped tail • Pseudo dragon
Giant polar worms • Remorhaz
Lives in poo, but burrows into live flesh • Rot grub
Humanoid eats ferrous metals such as iron, steel, and steel alloys • Rust monster
Fiery magic amphibians • Salamander
Half lion and half fish • Sea lion
Slimy, ambulatory, intelligent heaps of rotting vegetation • Shambling mound
Screaming fungus • Shrieker
Mosquito-like magical beast • Stirge
Horrid carnivore able to regenerate damage taken • Troll
Magical equine woodland creature • Unicorn
Feeds upon the life force of dying beings • Will o’ wisp
Undead with chilling touch that drains life energy • Wraith
Magically animated corpses • Zombie
Posted in Encounter and tagged puzzle, The Tomb of Athganazar by Stephen Hilderbrand with no comments yet.
Room 4: Wands vs. Wall
Upon entering this hexagonal chamber the first thing that you see is a mesmerizing wall of warm, red energy which seems to cut straight through the center of the room. On the wall to your left are six stone shelves carved into the stonework. Upon each shelf rests a single wand. An ebony plaque laid into the floor reads:
“To gain your prize you must pass the wall”
Under each wand is an etching in the stone each with a single word engraved upon it. The words from left to right are:
Blow, Chill, Bolt, Zap, Sun, Pass
These are the command words for the wands and a clue as to the effect that each wand casts. The wands themselves have a single charge and may be used by anyone capable of uttering the command word. The wall can be destroyed, color by color, in consecutive order, by various magical effects; however, the first color must be brought down before the second can be affected, and so on. Thus, the “Chill” wand must be used before the “Blow” wand etc. in order to bring down each successive layer.
If the party fails to use the wands in the correct sequence, the wands will regain their charges and the wall will reset to its original state once someone attempts to pass through the wall.
Anyone attempting to pass through an active wall will take each and every one of the effects that remain active.
Red (1st)
Stops non-magical ranged weapons.
Deals 20 points of fire damage (Reflex half).
Dispel: Chill (Cone of cold)
Orange (2nd)
Stops magical ranged weapons.
Deals 40 points of acid damage (Reflex half).
Dispel: Blow (Gust of wind)
Yellow (3rd)
Stops poisons, gases, and petrification.
Deals 80 points of electricity damage (Reflex half).
Dispel: Zap (Disintegrate)
Green (4th)
Stops breath weapons.
Poison (Kills; Fortitude partial for 1d6 points of Con damage instead).
Dispel: Pass (Passwall)
Blue (5th)
Stops divination and mental attacks.
Turned to stone (Fortitude negates).
Dispel: Bolt (Magic missile)
Violet (6th)
Stops all spells.
Will save or become insane (as insanity spell).
Dispel: Sun (Daylight)
DM Note: another method of gaining the key fragment would be through a creative use of the Passwall wand to create a passage either under or to the side of the prismatic wall thus allowing someone to squeeze around the wall (Dex check DC 14) to get to the key with the wall still up. However Passwall will not create a passage directly through the prismatic field and will have no effect upon it at all except to negate the 4th layer (provided that layers 1-3 have already been correctly neutralized).
After red is disabled:
The wall of red energy sputters under the chill wind projected by the wand. In its place, a swirling orange edifice with bands that stretch across the room.
After orange is disabled:
Bolts of acid bombard the swirls, which writhe like tentacles, grasping the bolts and dissolving into withered hulks of petrified wood wrapped with barbed wire. Yellow electricity arcs between the tips of the metallic sinews.
After yellow is disabled:
The wooden wall disintegrates into a line of lime green sawdust, which wisps up into the form of mortar in a brick wall, only there are no bricks.
After green is disabled:
The mortar drips with a viscous gel that runs down the spaces between the mortar, dissipating in iridescent blue stones that run the length of the corridor and pulsate with each heartbeat.
After blue is disabled:
A large volley of bolts shoots from the wand, landing in a door-shaped pattern among the blue stones. Blood runs down the wounds, the blue stones turning a deep purple.
After violet is disabled:
A flash as bright as daylight temporarily blinds everyone in the room. When you rub your eyes, you see no signs of the prismatic wall. There, resting on a seventh shelf at the far end of the room is a prismatic key, its hexagonal handle aglow in all six colors of the wall.
Posted in 3rd edition Dungeons & Dragons / d20 fantasy / Pathfinder, Adventure, Encounter and tagged The Tomb of Athganazar by Stephen Hilderbrand with no comments yet.
Room 3: Golem Guardian
A 40′x40′ chamber opens before you. Nestled in between two large stone fountains set into the wall, a rusty statue twice the size of a man dominates the far wall of this room. Its chest is puffed out, revealing an oversized keyhole. The heads of jackals adorn the walls above the marble fountain basins, their jaws open wide, spewing a steady stream of gurgling, sudsy liquid.
As they approach the fountains or statue:
Glowing embers illuminate the eyes of the ruddy statue. Its metallic jaw rumbles, spilling bits of nuts, bolts, and screws upon the floor. Finally, it speaks.
“I am G-L-M. I hold great mysteries. I will not attempt to bar your way – if and only if you can assist me in my existential dilemma. If you challenge my existence, or my authority on such matters, you will face my wrath.”
The rusty statue is a rusted iron golem with a door on its chest and inside there are various potions to heal and restore the party as well as one of Athganazar’s key fragments, an iron key.
If they answer the golem’s questions correctly then they gain the key and the potions.
If they do not answer the questions, then they must fight the golem and the potions will be destroyed. In this case, they will also need to find a way to open the golem’s chest, since it it rusted shut.
Questions:
- What is my condition?
- What beast think you that crossed my path to bring me to this condition?
- What can be used to soothe my weary joints?
- What other materials are my brethren made from that would not suffer the same fate?
- Yet I am the mightiest! Take these metal boxes and give me an appropriate name. Not all boxes are needed, but all must be heeded. With this he opens his chest and out drop 10-12 boxes labeled with letters. DM Note: Use letter dice or tiles from a popular word game for this.
- Now tell me how I have earned this name and how I am the mightiest!
One set of answers the golem will accept:
- Rusted; angsty; bored; disused.
- A rust monster attacked the golem; the golem has been here between the fountains for far too long; golem has idled too long.
- Grease or some lubricant; the grease spell; a higher purpose.
- Flesh, clay, stone (also bone, straw).
- The answers to this challenge depends on their roll of the letter dice. They will have to make this up themselves – the more patronizing the higher chance of success.
- Here they should air on the side of honoring and praising the golem to earn its respect.
Upon success, the golem will seem pleased and it will present the healing potions and the iron key.
With each incorrect answer, it will take a 5′ step closer to the nearest adventurer and bellow “Incorrect!”, “No” or “This angers me.” With each correct answer, it will say “Correct” or “Yes” or “This pleases me.”
Posted in 3rd edition Dungeons & Dragons / d20 fantasy / Pathfinder, Adventure, Encounter and tagged The Tomb of Athganazar by Stephen Hilderbrand with no comments yet.
Room 1: A Restful Chamber
This tapered 30′x30′ room is cast in a pale blue light that evokes the calm skies of a mid-spring afternoon. An animated mural of puffy clouds meander about the domed ceiling. Small, decorative cockatrice feathers in a variety of pastel colors float along a plane six inches out from the walls indicate a protective ward, a testament to a great arcane power that still is rooted in this tomb. Carved in to the far wall above a granite crucible are a set of arcane runes. Copper braziers fill the four corners of the room. Above them float golden feathers that are interspersed among the others.
If someone can read magic, the runes say:
To be at peace. To be at rest. To be mended. To pass the test.
This is the central room to this level. The room is warded against any unexpected encounters, so this room provides the dungeon delvers a refuge to fall back to and regroup as needed. Any attempt to grab the feathers will be unsuccessful, as they are also warded and will move away from any advance. After each key is collected, the adventurers can rest here and receive 2d8 hp of healing from the room.
Once all four keys are collected, the crucible can be used to reforge Athganazar’s key. All four keys must be placed in the crucible and all four braziers pushed around the crucible.
Posted in 3rd edition Dungeons & Dragons / d20 fantasy / Pathfinder, Encounter and tagged The Tomb of Athganazar by Stephen Hilderbrand with no comments yet.
Room 2: Chamber of Self Reflection
In this room you find a table, upon which are a collection of charred tiles. A shattered floor-to-ceiling mirror dominates the opposite wall. Scrawled at waist height along the mirror in faded black finger paint is the following:
“Upon reflection you may find the key.”
Looking closer at the black paint shows that is actually ash. Looking closer at the tiles on the table reveals:
Nine tiles lie scattered upon the ash-covered table, each with a unique symbol inscribed upon them.
Upon moving the ash from the table, either by hand or by creating a breeze:
Eight indentations (each of which would fit one tile) set in a line across the center of the table. Above the indentations, floating in an arc above the indentations, glowing ash reads:
“Leave all but your number. Leave the rest in order.”
Once someone touches any of the tiles the encounter begins with the springing of a trap.
With an enormous thud, a large stone block drops to the floor, sealing the doorway. In the dissipating dust, a flash catches your attention and you can barely make out a marble sized dot of fire hovering in the air between the table and the mirror. With a ticking sound, the fire pulses slightly once per second, as if keeping time.
The dot is a Delayed Blast Fireball (10d6+1 points of damage) which will detonate exactly 60 seconds after the encounter is activated. The only way to prevent this from happening is to correctly solve the riddle. The tiles upon the table must be laid out in the correct sequence, omitting the number of characters in the party exploring the tomb. Upon the tiles are the numbers 1 through 9 which are drawn with a reflection of themselves.
You will need to give the players actual tiles with these symbols upon them (jumbled up of course) and will only consider the riddle solved once they have been placed into the order shown above.
If they fail to do this within the 60 seconds, the fireball detonates, the door opens and the encounter resets. It will continue to do this until the puzzle is correctly solved.
The mirror is simply a red herring placed there to potentially throw people off. It serves no useful purpose except to provide a clue as to the nature of the mirrored numerals that comprise the symbols.
Posted in 3rd edition Dungeons & Dragons / d20 fantasy / Pathfinder, Encounter and tagged The Tomb of Athganazar by Stephen Hilderbrand with no comments yet.