Claw Claw Bite Paints – Happy Little Figures

We here at Claw Claw Bite love using visual aids in our games. Whether it’s handouts, maps, illustrations, models, tiles, intricate model terrain, lego creations, or dungeon-building blocks, for some of us gamers lots of fun and enjoyment comes from the props we use in our games. In that spirit, here’s a little painting guide I put together for big, textured figures such as elementals. Personally, I have always wanted good figures for all of the classic elementals, but have never found a collection of them that I really liked until a fairly recent set of sculpts from Reaper Miniatures. I got the large water and earth elementals first, and then, several years later, got the large air and fire elementals. And now that I have them, I want them to look good, so I put some paint on them. Here’s what I did.

The figures used here are from Reaper’s line, but the guidelines explained here could be used for any similar miniature, or could be used for painting stone terrain. It’s an easy, fun project for beginning painters or veterans alike.

Both the fire elemental and the air elemental started with a base coat of spray model primer. In the past I would prime by hand but eventually found that a careful spray of primer gives a thinner coat and therefore diminishes the details of the figure less. I always use a respirator (gas mask) because those VOCs will give you the cancer, so whatever you do, don’t inhale those fumes. Stand upwind or whatever.

For both of these figures I planned a paint scheme of simple gradients through the appropriate colors. For the fire elemental I wanted a base of red in the crevasses, then a big slow dry coat of orange, then a highlight of yellow. The air elemental will go from base purple, through a progression of lighter blues and a top coat of white. Well, turns out that with figures this big and a paint scheme like this you can do very well by turning your usual dry-brushing into slightly-wet-brushing. The paint gets on the big figure faster and the scale of the details doesn’t suffer from a broad stroke. Feel it out as you usually would – try a small amount of paint on an inconspicuous spot and see what you think of the results.

These figures turn out to be very fun to paint because of their large size and the nature of the figures. There are no careful touch-ups to do because you accidentally got a drop of green on the figure’s white scroll. You just go from the valleys to the peaks of the sculpture with a darker to lighter gradient of colors and get a very dynamic figure (with all due credit to the talented sculptors over at Reaper).

So, here are the step-by-step pictures from this painting exercise. Get the dark color in the depressions, then wet-brush the highlights with the middle color, then dry-brush the highlights on the top ridges.

The models used here were from the Reaper Miniatures line here:

http://www.reapermini.com/OnlineStore/elemental/latest/02251

http://www.reapermini.com/OnlineStore/elemental/latest/02252

http://www.reapermini.com/OnlineStore/elemental/latest/02780

http://www.reapermini.com/OnlineStore/elemental/latest/02777

Happy painting,

Adam A. Thompson


Posted in Miniatures by with no comments yet.

Free Dungeon Tile Sites

Here are some great resources for free dungeon tiles.

There are a ton more out there!  The first 5 pages of Google search results are full of other sites featuring tile sets to choose from.  Also, check out rpgnow.com for more options, including Skeleton Key Games’ epic collection.

Once you’ve found your tiles of choice, print them out and follow these directions to make some great memories at the gaming table.


Posted in Miniatures by with no comments yet.

Terrain Tiles on the Cheap

Here’s an early Xmas present from the gamers at Claw/Claw/Bite.

Wizards and others have provided cardboard cutouts to enhance the gaming experience.  This is great, but they’re pretty pricey and limited if you want a collection of tiles the represent the breadth of your imagination.  I recommend making your own, so you have more creative control over your adventures.  In a few simple steps, you can have terrain tiles in a variety of shapes and colors.

Step 1: Download Images And Print Them to Your Scale

Most standard tiles are 1″x1″, representing 5′ squares in most fantasy and sci-fi games.  There are a host of good tiles on rpgnowand elsewhere on the web, easily found with a g search.  Use a color printer, ideally one that leaves a waxy resin on the page.  This way the spray epoxy used in step 4 doesn’t warp the paper.

Step 2: Cut Images from Printouts

Use a regular pair of craft scissors, the kind they have at work, or that you can buy for a few dollars at a craft store.  Leave a few mm to a cm along every edge so you can apply a goodly amount of pressure along the edges of the images later to ensure a tight seal along the edge of the final tiles.  X-acto knives also work for this purpose; just make sure you place your work on a cutting board to avoid injury and damage to your furniture.

Step 3: Raid Your Recycle Bin For Light Cardboard

Use cereal and oatmeal boxes or any other post-consumer packaging.  Cut them at the edges so you have flat surfaces to work with.  Ask your neighbors or take home used dry food boxes from work.  Or go spend money on a thicker cardstock as others have reported online. Personally, I prefer using what I’ve already paid for, taking advantage of the second R in the reduce, reuse, recycle cycle.  If nothing else, it makes me feel less guilty about buying food that comes in a cardboard box.

Make sure you gently bend the cardboard to straighten them out before you glue the terain printouts to them; otherwise you may loosen the seal between the two.

Step 4: Spray Cardboard with Epoxy

I recommend using Elmers or 3M spray epoxies for this task.  Use these spray expoxies outdoors where there’s plenty of ventilation.  Try to use evan coats by holding the can 12″ away from the surface, and gliding across the surface quickly.  Alternately, use epoxies that come with applicators that allow you to apply an even coat of epoxy to the surface of the cardboard.

Step 5: Press Cutouts to Cardboard

Starting in the center, run your hands to the edges of the images.  This way, you avoid air pockets between the paper and the cardboard.  If you’ve kept enough of a lip around the exterior of the image, you should be able to press to the edge of the image without getting residual glue all over your hands.

Step 6: Wait Overnight

Overnight is best to ensure that the epoxy is fully dried.  These should be stored indoors to prevent air pockets due to moisture or temperature changes.  Keep these away from where you sleep, as there are epoxy aerosols and other air pollutants that leech out from the tiles.  If you do not wait long enough, the bond may not be strong enough to hold the pieces together in the long term.

Step 7: Cut off Excess Cardboard

I cut mine all the way to the edge of the image so I can place the tiles together to create larger rooms and dungeons.  They fit together pretty neatly if you make straight enough cuts.

Once this is done, you may want to touch up the edges with a marker to hide the white cardboard underneath from view when your terrain is deployed on your gaming table.

I have found that for a $10 can of spray epoxy, I easily get between 120 and 150 8×8 tiles worth of tiles in a wide assortment of styles.  I’ve put them to use in science fiction stories, Gamma World settings, and Dungeons and Dragons encounters.  This variety of tiles is a must for any storyteller who likes to mix up their adventures using a variety of terrains.

Have fun with it and make your players proud!

Note: If you use these tips, please take photos and send ‘em our way.  We love to see what other gamers are up to in their creative construction and use of terrain.


Posted in Miniatures and tagged by with no comments yet.

Miniatures!

We’ve been on a mini-buying spree lately, and thought we’d let you know what we though of the pieces we’ve picked up.

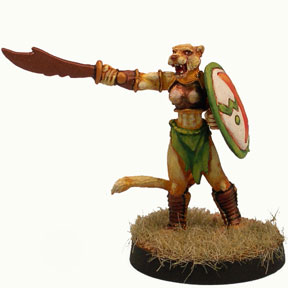
Black Orc Games makes a great set of figures that are really interesting. Nonstandard humanoids like cat-people and monkey-men have helped round out player characters in the Savage Tide game I’ve been running. And they’re very affordable — many are on special for just a dollar! http://cart.blackorc.com/

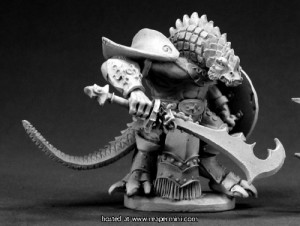
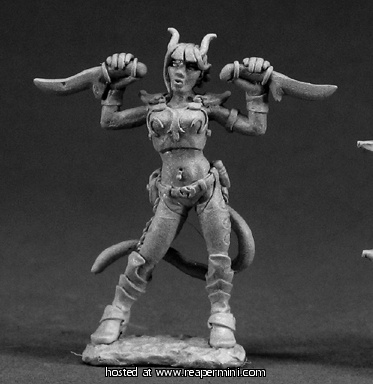
Reaper Mini is where I’ve ordered the majority of my figures over the years, and I was looking over their site for figures to use for our 4th Edition characters. I found a figure that will work nicely for my dragonborn warlord, and one for my friend’s tiefling thief. I hope to see more dragonborn-usable figures in the future from them, ones that capture the power and majesty of these two new core races, and as I write this I can see that they don’t disappoint.


Posted in Miniatures, Review and tagged by with 1 comment.

Miniatures: Thunderbolt mountain


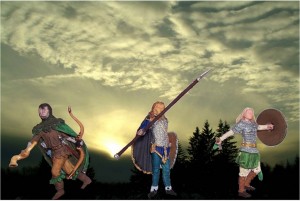
Just a quick post this Monday to show off some figures I just finished painting. They’re some of the exquisite figures from Thunderbolt Mountain, of the famous and brilliantly talented Tom Mier. This isn’t a paid shill for Tom, I just love his work. And they always throw in a free monster figure when I order from them, like a goblin or a skeleton. It’s the little extra touches that get me…

Wow! I just looked at Thunderbolt Mountain’s site, and saw the new releases for Gencon! A wood elf champion and scouts! Take a look!

Wait, forget those (although they’re cool)… I started to ready his blog here, and check this out!!! That’s truly incredible!

So I just threw them into GIMP and put a cheezy background on it. Not bad for 15 minutes of work… They look pretty heroic there. Now they just need a big dragon behind them to be fleeing from 😛

In other news, stay tuned this week for more content coming from Unicorn Rampant on Claw / Claw / Bite ! You’ll be seeing the Great Earth Serpent (CR 20), the lawful good Bronze Golem (CR 8) and more Castle Steiglitz and much, much more!


Posted in Miniatures and tagged by with no comments yet.